Showing posts with label Desserts. Show all posts

September 7, 2013

Chocolate Zucchini Sheet Cake


Soft, fluffy, and moist chocolate sheet cake with a pourable chocolate butter glaze. No one will ever be able to tell that there are three cups of shredded vegetables in this goodness! 

Chocolate Zucchini Sheet Cake | www.the-taste-tester.com

Chocolate Zucchini Sheet Cake

Recipe Source: adapted from The Essential Mormon Cookbook by Julie Badger Jensen

For the cake:

2 1/2 cups all-purpose flour
2 cups granulated sugar
1/2 teaspoon salt
1 teaspoon baking soda
1/4 teaspoon baking powder
1/2 cup + 1 tablespoon unsweetened cocoa powder
3 eggs
3 cups grated zucchini
1 cup cold salted butter, cut into cubes
1/2 cup whole milk

Preheat the oven to 350˚F. Grease and flour a 13x18 inch sheet pan. Set aside.

In a large bowl, whisk the flour, sugar, salt, baking soda, baking powder, and cocoa powder together until thoroughly combined. Add the eggs and the zucchini with a hand mixer. 

Put the butter cubes and milk in a small saucepan and heat until milk is scalded and butter is completely melted. Immediately pour into the cake batter and mix with a hand mixer until combined. Pour into prepared baking sheet and bake for 18-22 minutes, or until a toothpick inserted in the center comes out clean. Remove from oven, and make frosting. Pour warm frosting over hot cake. Let cool to warm or room temperature before eating.

For the frosting:

1/2 cup cold salted butter, cut into cubes
1/3 cup whole milk
6 tablespoons unsweetened cocoa powder
3 1/2- 4 cups powdered sugar
1 teaspoon pure vanilla extract

Whisk cocoa powder and powdered sugar together in a small bowl. Bring butter and milk to a boil in a medium saucepan over medium high heat. Remove from heat and beat in the vanilla, cocoa powder and sugar.

Serves: 24
Calories per serving: 300
Carbs per serving: 38g

Print Friendly and PDF

March 28, 2013

Pass the Cook Book Club: Guy Fieri's Cherry Cobbler Pizza

Even though I totally procrastinated this month, I am really loving this cook booking club. Next month's recipes are from The Picky Palate Cookbook and they all look incredible so stay tuned.

Because I waited so long to get this post done I chose the easiest recipe on this month's list, and the one that I had the most things on hand for. I should have made the quinoa which had rave reviews on our cook book club facebook page, but I didn't (I am going to very soon though).

To be totally honest, this wasn't my favorite dessert ever. For starters I don't like cherries (but that doesn't stop me from tasting them all the time, to see if my taste buds have changed). I didn't love how loose and crumbly the crisp topping was either. I felt it needed a little more brown sugar and a little more melted butter to give it some substance. I wanted so badly for it to be like the crisp topping on my favorite apple crisp.

However, my husband loved this. Dessert pizza is always a win in his book. Next time I make it (because there will be a next time), I am thinking it will be with homemade peach pie filling and an adapted crisp topping that is more to my liking.


Cherry Cobbler Dessert Pizza

Recipe Source: Guy Fieri Food: Cookin' It, Livin' It, Lovin' It (He tops his with mascarpone cheese instead of icing. The crust recipe is adapted ever so slightly from Lauren's Latest)

Wheat Pizza Dough:

1 cup warm water
1 tablespoon honey or sugar
2 1/2 teaspoons active dry yeast
2 teaspoons salt
2 tablespoons canola or vegetable oil
1 1/2 cups bread flour
1 cup whole wheat flour *plus or minus a quarter of a cup depending on humidity


In the bowl of a stand mixer fitted with the whisk attachment, stir the yeast and sugar (or honey) into the warm water. Let that sit for five minutes--- it should expand a little and look bubbly. Turn the mixer on low and add the oil, salt, and bread flour. Remove the whisk attachment and secure the bread hook. Add in the whole wheat flour. You might need a little more or a little less than a cup. When you are done adding flour you want the dough to be soft and look sticky but not actually stick to your hands when you touch it.

Turn the mixer on high and let it knead for 6 minutes. Form dough into a ball and return it to the mixing bowl. Cover and let rise for two hours (or until double in size).

Pizza Toppings:

1 (21 ounce) can cherry pie filling
1 cup quick-cooking oats
2 tablespoons dark brown sugar
2 tablespoons butter, melted
1/4 teaspoon cinnamon
a pinch of salt
1/4 cup sliced almonds

To prepare crisp topping, mix the oats, brown sugar, butter, salt and cinnamon together until crumbly. Stir in almonds. Set aside.

Preheat oven with a pizza stone in it to 425 degrees. Just for the record, an upside down cookie sheet works perfectly as a makeshift pizza stone. Roll prepared pizza dough into a large rectangle on parchment paper (about 8 by 12 inches and a quarter of an inch thick). Spread cherry pie filling over crust. Sprinkle oatmeal crisp topping over cherries.

Carefully slide pizza onto pizza stone in oven. Bake for 10-12 minutes or until crust is golden and cherries are bubbly. Prepare icing while pizza is in the oven. Drizzle with icing while pizza is still hot and serve immediately.

Cream Cheese Icing: 

2 oz cream cheese
2 tablespoons butter, softened
1 cup + 2 tablespoons powdered sugar
1/2 teaspoon vanilla
1-2 teaspoons milk

Cream butter and cream cheese together until smooth. Add powdered sugar, vanilla, and milk. Whip until smooth and fluffy. If needed, add more milk until icing reaches desired consistency.


Print Friendly and PDF

Disclaimer: This post contains affiliate links. If you click on these links and purchase the product, it will not cost more for you but I will earn a tiny percentage of commission which helps me keep this blog up and running. Thank you!

If you like what you see, feel free to follow me on Facebook, Pinterest, and/or twitter.

February 4, 2013

Maple Bacon Donuts as A Valentine's Day Gift

If your sweetheart is anything like mine, then I'm guessing they'll love this Valentine's gift. I mean, is there a better way to express love than a sweet and salty home baked good covered in crispy bacon? No, no there's not.

Maple Bacon Donuts--- A Valentine's Gift. There's truly nothing better than expressing your love with bacon. #gift #valentines #recipe

You can get the printable that I used on my paper bags here and here. I bet you are wondering why one of the documents has a "?" and the other has a "!". Well, it just depends on what kind of message you want to get across. I realize that "Don't you know I love you" is a question. But on the printable it sort of looks like you're saying, "I love you?". I personally like the one with an exclamation point better, "I love you!".

By the way, if you are skeptical about the maple-bacon-combo, you've got to try these. They're delish. If you'd rather not make the dough from scratch, then go buy some plain glazed donuts, dip them in the homemade maple frosting and finish them off with cooked crumbled bacon. They'd still be a yummy gift, just easier.

Maple Bacon Donuts--- A Valentine's Gift. There's truly nothing better than expressing your love with bacon. #gift #valentines #recipe

Baked Maple Bacon Donuts

Recipe Source: Adapted from Make Lemonade and More!

Maple Bar Dough:

1 1/2 cups milk
5 tablespoons butter, cut into cubes
5 tablespoons sugar, divided
2 teaspoons salt
1/2 cup warm water
2 tablespoons yeast
2 large eggs, beaten
5 1/2 cups flour (plus or minus 1/2 a cup - depending on humidity)
2 teaspoons cinnamon

Additional Ingredients:

16 slices bacon, cooked until crispy and then crumbled

Scald milk in a small saucepan over medium heat (don't boil it--- scald it! When milk is successfully scalded it looks frothy around the edges inside the pan). Once milk is scalded, remove from heat and stir in three tablespoons sugar and the butter. Set aside and let cool to lukewarm.

In the bowl of a stand mixer fitted with the whisk attachment combine warm water, remaining two tablespoons of sugar, and yeast. Your water will need to be warm enough to activate the yeast but not hot enough to kill it. Let the yeast mixture sit for five minutes. It should bubble and grow.

Once the yeast is ready and the milk mixture has cooled to warm, add the beaten eggs to the yeast. Then gradually mix in the milk mixture and the cinnamon. The cinnamon may clump but it will un-clump when you add in all of the flour.

Add half of the flour and mix until combined. Then remove the whisk attachment and secure the dough hook attachment. Stir in the remaining flour. You will know that the dough is ready when it cleans the side of the bowl, is soft, but does not stick to your fingers. 

Knead dough in machine for 5 minutes. Spray another large bowl with non-stick cooking spray. Remove dough from mixer and place in prepared bowl. Cover. Let rise for 1 to 1 1/2 hours at room temperature OR refrigerate overnight (8-12 hours). Either way, the dough will double in size.

After dough has risen, roll it into a rectangle about 1/2 inch thick. Using a cookie cutter, cut out donuts. You can also use a pizza cutter to cut the rectangle of dough into bars. Place on parchment paper lined cookie sheets. Let dough rise for 30 more minutes.

While they rise, preheat oven to 425 degrees. Bake for 7-8 minutes or until they are a light golden brown. Remove and let cool slightly. Meanwhile make the icing.

Maple Icing:

1/3 cup butter
1 cup packed brown sugar
1/4 cup milk
1 1/2 cups powdered sugar
2 teaspoons mapleine (maple flavored extract)
1/8 teaspoon salt

Combine butter, brown sugar, and milk together in a small saucepan. Bring to a boil over medium high heat. Let simmer for three minutes. Remove from heat and using a hand mixer blend in powdered sugar, mapleine, and salt.

While donuts are still warm, dip the tops of the donuts into the icing. Top frosted donuts with cooked crumbled bacon. Store leftovers in the fridge (because of the bacon). 

Maple Bacon Donuts--- A Valentine's Gift. There's truly nothing better than expressing your love with bacon. #gift #valentines #recipe

Do you like what you see? If so, be sure to follow me via facebook, twitter, and/or pinterest! You can also subscribe by email over in the right sidebar; you'll never miss a post!

Print Friendly and PDF

Shared here: On the Menu Mondays @ StoneGable

January 31, 2013

Blogiversary + Cupcakes for Two

It's official. As of today, I have been food blogging for one year. It definitely was not easy getting started. There were a lot of discouraging moments along the way and I, for one, am glad I didn't give up. Having this blog and being able to express myself in a creative way has made this year one of the best of my life.

When I thought about what I could make to celebrate this momentous occasion, my initial ideas were treats I could share with anyone and everyone. Then I realized that there was really only one person who I wanted to share this day with: David. He knows this blog is important to me and he's been the most supportive husband throughout this past year. There were times where he would have been totally justified in loathing how much time I've had to put into this, but instead he invested everything in helping me chase my dreams. 

So what I needed was a recipe that made treats just for two, and I found it: One Bowl Cupcakes for two. Seriously, these cupcakes are a revelation. They are the perfect cupcake consistency--- not too dense but not too fluffy. They are moist and they taste incredible. I even thought about multiplying the recipe by six just to make twelve cupcakes to eat all on my own.

Because my baby has RSV right now, and I am totally sleep deprived I am just going to send you over to How Sweet It Is for this cupcake recipe. I promise that you most likely have every ingredient you need on hand. So go make them. Right. NOW. The original recipe calls for one teaspoon of vanilla, but we used half a teaspoon of vanilla and half a teaspoon of almond extract--- that is the only thing we changed.


If you have leftover frosting you can use that to top these off. I never have extra frosting... so here's a little recipe just for you.

To get the One Bowl Cupcakes for Two Recipe click here.

Frosting for Two Cupcakes

1/2 cup powdered sugar
1 tablespoon butter, softened
1/2 tablespoon milk
1/8 teaspoon almond extract
1/8 teaspoon vanilla extract

Mix all ingredients together until smooth. Start with 1/2 a tablespoon of milk and add more in until frosting reaches desired consistency. Spread over cooled cupcakes.


Print Friendly and PDF

Shared here: Pin Me Fridays @ Diana Rambles (it's a great link party--- check it out!), On the Menu Mondays @ StoneGable

January 25, 2013

"Healthy" Chocolate Cake

A few weeks ago I had a reader request a recipe for a healthy chocolate cake. Now, I am no expert on health which is why I am simply going to claim that this cake is "better-for-you" than a normal chocolate cake recipe. 

I really liked it. I wouldn't say it was my favorite chocolate cake ever, but at only 100 calories per slice (according to the original source) I was happy with how it turned out. Plus it has zucchini in it and I have always loved a chocolate zucchini cake. My husband liked it as well which surprised me because it was a very dark-chocolate-tasting sort of cake and my husband hates dark chocolate. 

I do think that next time I make this I will try and find a way to replace the brown sugar with a sweetener that is more natural and good for you. I was actually very surprised by how much brown sugar is in this cake--- that's the only thing I would change.

By the way, brown sugar is not any better for you than white sugar. I actually had someone ask me that recently and for the record brown sugar is essentially just granulated white sugar with added molasses. Brown sugar vs. white sugar is not like whole wheat flour vs. white flour or brown rice vs. white rice. Just because it is brown doesn't mean it is better for you.

If you are looking to make this with a healthier sweetener, this website may be helpful in finding the right sweetener for the job.  Recently I have found their Guide to Natural Sweeteners very helpful.

Chocolate Cake with ONLY 100 calories per slice! www.the-taste-tester.com #recipe

Better-For-You Chocolate Cake

1/3 cup whole wheat flour
1/3 cup white flour
3/4 cup brown sugar
1 teaspoon baking soda
3/4 teaspoon baking powder
1/4 teaspoon cinnamon
1/4 teaspoon salt
1/2 cup cocoa powder
2/3 cup unsweetened applesauce
1 egg, lightly beaten
1 teaspoon vanilla
1 cup finely shredded zucchini
1/2 cup semi-sweet chocolate chips (optional)

Preheat oven to 350. Grease either a round cake pan or a bundt pan with non-stick cooking spray.

In a medium size bowl, mix together flours, brown sugar, baking soda, baking powder, cinnamon, salt,  and cocoa powder. Add the applesauce, egg, and vanilla just until the batter is combined and smooth. Fold in zucchini and chocolate chips.

Pour into prepared pan and bake for 20-25 minutes (round cake pan) or 30-35 minutes (bundt pan). When the cake is done a toothpick inserted in the center should come out clean and the cake will have just pulled away from the edges of the pan.

Cool for 10 minutes in the pan on a wire rack before flipping out. If you wait longer than ten minutes, or if you flip too soon you may have problems with the cake sticking to the inside of the pan.

We topped our cake with homemade vanilla ice cream. A 1/10 wedge is approximately 100 calories.

Recipe Source: Yammie's Noshery

Print Friendly and PDF

Shared here: Pin Me Fridays @ Diana Rambles

December 22, 2012

Layered Peppermint Dessert

I am doing A LOT of last minute grocery shopping today. Are you? Well just in case you are, and just in case you still have no idea what to make for dessert on Christmas, I decided to do a last minute dessert post for you. You're welcome.

This dessert is easy to put together and it is super yummy. Plus, all of the peppermint flavor just screams Christmas. You don't have to use your oven to make it which could be a bonus if you have fifty-million other things that you have to rotate through your oven for that holiday feast. 

Layered Peppermint Dessert an easy recipe idea for your holiday feast #recipe #dessert www.the-taste-tester.com

Layered Peppermint Dessert

For Cake and Filling:
1 (14.4 ounce) box chocolate graham crackers
1 1/2 cups whipping cream
1/4 cup powdered sugar
1 (3.4 ounce) package Jell-O White Chocolate instant pudding*
1 1/2 cups milk
1 tablespoon pure peppermint extract
20 drops red food coloring
1 (6 ounce) package peppermint candy canes, crushed

For Chocolate Glaze:
1/4 cup butter
1/4 cup cocoa powder
1/4 cup milk
2 cups powdered sugar
1 teaspoon vanilla

For Whipped Topping:
1 1/2 cups whipping cream
1/4 cup powdered sugar
1/3 cup reserved crushed peppermint candies

Break graham cracker sheets in half (making them squares). Arrange 15 graham cracker squares in the bottom of a 9x13 pan. Beat 1 1/2 cups whipping cream with 1/4 cup powdered sugar until stiff peaks form. Set aside. Combine instant pudding powder with milk. Whisk vigorously by hand for 2 minutes. Let stand for 5 minutes.

In the meantime crush candy canes and reserve 1/3 cup of them for garnish. After the pudding is set, stir in food coloring (until hot pink) and peppermint extract. Fold in whipped cream and remaining crushed peppermint candies.

Spoon half of the pink peppermint mixture over graham crackers in pan. Spread evenly. Top with 15 more graham cracker squares. Spoon and spread remaining peppermint mixture over second layer of graham crackers. Top with fifteen more graham crackers. 

Next make the chocolate glaze. Melt butter and cocoa powder together in a small saucepan over medium heat. Bring to a simmer and let bubble for 1 minute. Gradually stir in milk, bring back to a simmer and let bubble for 3 more minutes. Remove from heat. Using a hand mixer, beat in the powdered sugar and vanilla until smooth. Immediately pour over the top graham cracker layer.

Refrigerate for 24 hours. This will allow the graham crackers to get super soft like a cake. Just before serving, beat 1 1/2 more cups of whipping cream with 1/4 powdered sugar until stiff peaks form. Spread over dessert. Sprinkle reserved peppermint candies over top. Using a knife dipped in hot water cut into fifteen squares and serve.

*You can use vanilla instant pudding

Recipe Source: The Taste Tester, chocolate glaze recipe from The Kitchn

Print Friendly and PDF

Shared here: On The Menu Mondays @ StoneGable, I Gotta Try That...,

December 19, 2012

Everyday Cinnamon Rolls (made in 30 minutes)

I'm craving a cinnamon roll.

This happens to me all the time. When I do get the itching for a cinnamon roll I have two options. ONE, I can spend a few hours making them completely from scratch and by the time they are done I have no interest in them anymore, or TWO I can go buy an altogether mediocre cinnamon roll from one of those places that wishes they were Cinnabon.

I have learned that neither of these options are desirable, which is why I bring to you the most gooey, moist, wonderfully delicious cinnamon rolls of all time. They can be made in thirty minutes flat and will get rid of any cinnamon roll craving very quickly. Yeah, you can thank me later.

It all starts with a pie plate and half a stick of butter. Melt said butter in microwave, right in your glass pie dish; add 1/4 cup brown sugar.

Cinnamon Rolls in 30 Minutes Flat!! www.the-taste-tester.com #recipe

Stir the brown sugar into the butter and spread in an even layer on the bottom of the pie plate.


Not that it matters but I forgot to take a picture at this point when I sprinkled three tablespoons of chopped pecans over this butter and brown sugar mixture. Next open your can of crescent rolls (don't judge me, I happen to love canned crescent rolls) and press the seams together, making a rectangular sheet.

Spread a lot of butter over your dough.

Cinnamon Rolls in 30 Minutes Flat!! www.the-taste-tester.com #recipe

Sprinkle a cinnamon sugar mixture generously over the butter. Starting at the long side, roll up the dough into a log. Pinch the dough closed. 

Cinnamon Rolls in 30 Minutes Flat!! www.the-taste-tester.com #recipe

Cut into eight cinnamon rolls with a very sharp knife, dental floss or all-purpose thread.

Place cut cinnamon rolls in prepared pan. I like to sprinkle any leftover cinnamon sugar over the tops of the rolls. Bake for 20 minutes at 350 degrees.

Cinnamon Rolls in 30 Minutes Flat!! www.the-taste-tester.com #recipe

Serve them hot, fresh from the oven. When we plate ours we like to flip the individual rolls upside down (so the gooey pecan part is on top) and then we drizzle them with sweet vanilla glaze. BEST CINNAMON ROLLS EVER. Easy, too.

Cinnamon Rolls in 30 Minutes Flat!! www.the-taste-tester.com #recipe

Everyday Cinnamon Rolls

Cinnamon Rolls:
1 can crescent roll dough
1/2 cup (1 stick) softened butter, divided
1/4 cup brown sugar
3 tablespoons chopped pecans (optional)
1/4 cup white sugar
1 teaspoon cinnamon

Sweet Vanilla Glaze:
1 cup powdered sugar
1/4 cup heavy cream
1 teaspoon vanilla

Preheat oven to 350 degrees. Spray an 8- or 9-inch glass pie plate with non-stick cooking spray. Put half of the butter (1/4 cup) in the prepared pan and microwave until butter is melted. Stir in brown sugar and spread evenly on bottom of pan. Sprinkle pecans over brown sugar mixture if desired.

Open the canned crescent rolls and pinch the seams together so that you have a rectangular sheet of dough. Spread remaining butter (1/4 cup) over dough. In a small bowl, combine white sugar and cinnamon. Sprinkle evenly over buttered dough. If there's too much cinnamon sugar, save for sprinkling on top of cinnamon rolls before baking.

Starting at the long side, roll dough into a log pinching the dough closed when finished. Cut into eight rolls. Place in prepared pan. Sprinkle with any extra cinnamon sugar. Bake for 20 minutes.

While cinnamon rolls are baking whisk powdered sugar, heavy cream, and vanilla together until smooth. When rolls are done, drizzle with glaze while hot and serve immediately.

Recipe Source: Kevin and Amanda

Print Friendly and PDF

This week I'm partying at!

PIN MEme
SixSistersStuff.com

December 14, 2012

New York Cheesecake with Homemade Cherry Topping

I've never been to New York City. Though between you and me, this frozen hot chocolate and this cheesecake I'm posting about today make me want to move there (along with a plethora of other delicious "New York" style foods). 

I. heart. cheesecake. When it is made the right way it is BAKED. I don't have much room in my heart for those easy, unbaked cheesecakes. Baked cheesecakes are the perfect combination of soft and firm, sweet and sour, and dessert-y deliciousness. 


Cheesecake is probably one of the only things that I could sit down and eat {the entire thing} in one sitting. This New York Style Cheesecake with Homemade Cherry Topping is no exception. Like most things I've made for the blog, I had to give lots of it away to friends and neighbors just so that David and I wouldn't gain thirty pounds in one sitting. Though if we had, it would have been worth it; this cheesecake is that good.

New York Cheesecake

1 1/2 cups finely crushed graham cracker crumbs
1 tablespoon sugar
1/2 teaspoon cinnamon (optional)
1/2 cup (1 cube) butter, melted
3 (8-ounce) packages cream cheese, softened
1 cup sugar
2 tablespoons flour
1 teaspoon vanilla
1/4 cup milk
3 eggs, slightly beaten
1/2 teaspoon finely shredded lemon peel (optional)


Preheat oven to 375 degrees. Lightly spray a springform pan (8 or 9 inches) with non-stick cooking spray. In a small bowl mix together graham cracker crumbs, 1 tablespoon sugar, cinnamon, and butter until fully combined and crumbly. Press into the bottom and about 2" up the sides of the prepared pan.

For filling, beat cream cheese, 1 cup sugar, flour, vanilla, and milk together until smooth. Stir in eggs and lemon peel just until combined. Pour filling into prepared crust.

Put the springform pan on a cookie sheet and bake for 35-40 minutes (9-inch pan) and 40-45 minutes (8-inch pan). You will know it is done cooking when a 2 1/2 inch area around the edges of the pan is set when you shake the pan gently (the middle will still jiggle slightly).

Remove springform pan from cookie sheet, and cool on a wire rack for 15 minutes. Using a small sharp knife, loosen the edges of the crust from the pan; cool for 30 more minutes and then remove the sides of the pan. Cool for 1 1/2 more hours on the rack. In the meantime make the cherry filling and let that cool completely at room temperature.

After the cheesecake has cooled for the additional 1 1/2 hours at room temperature, pour the cooled filling over the top of the cheesecake and cover cheesecake with plastic wrap. Move cheesecake to refrigerator and chill for at least four hours before serving.

Yield: 12 slices
Recipe Source: The Taste Tester, adapted from Better Homes and Gardens

Cherry Topping

10 ounces fresh or frozen cherries, pitted
1 lemon, juiced
6 tablespoons sugar
1 tablespoon cornstarch
1/2 cup cold water

Combine cherries, lemon juice, sugar, cornstarch, and water in a small saucepan. Bring to a boil over medium high heat. Once it comes to a boil, cook for an additional 1-2 minutes. Remove from heat and cool to room temperature.

Recipe Source: The Taste Tester, adapted from Smitten Kitchen

Print Friendly and PDF

This week I'm partying at!

StoneGable

December 12, 2012

Homemade Cracker Jacks

Are you sick of treats and candy yet? Well, I am. After today I only have a couple more fun treat recipes for you and then I will be moving back to posts on regular stuff like actual meals and holiday appetizers. I think I got a little carried away with all of this sugary goodness.

In the meantime, we are on to another treat. My husband's family calls this popcorn recipe "Grandma Beth's Microwave Popcorn". I think it's very similar to cracker jacks. My hubby is the one who makes this whenever we have it and I personally think that the way he makes it is genius (it all has to do with a brown paper grocery bag--- read the recipe below).


Grandma Beth's Microwave Popcorn

1 1/2 cups brown sugar
3/4 cup butter (not margarine)
1/3 cup Karo syrup
3/4 teaspoon salt
3/4 teaspoon baking soda
5-6 quarts popped popcorn (popped in an air popper)
1 1/2 cups roasted salted peanuts (we used almonds in the popcorn pictured above- you can use any kind of roasted salted nut)

Before making the caramel mixture, pop your popcorn. You want to end up with 5-6 quarts of popped corn. Measure 20 double handfuls into a large brown paper grocery sack. We use the handful measuring method so that we can sift out old maids and discard them as we go.

In a 1 1/2 quart bowl, stir together the first four ingredients (brown sugar through salt). Bring to a boil in the microwave. Once it has come to a boil, microwave on high for 2 minutes. Remove from microwave and stir in baking soda until combined (it will bubble up). Pour caramel mixture over the popcorn in the brown paper bag. Add your roasted salted nuts to the bag at this point. Working quickly, fold down the top of the bag and shake well.

Put the brown paper bag into your microwave and cook for another 1 1/2 minutes. Remove bag and shake again. Return to the microwave and cook for 1 1/2 more minutes. Spread onto a parchment paper lined baking sheet and cool. It will get hard and crispy as it cools. Break apart and eat!


This popcorn is super easy to make because it is all done in the microwave, and it is fun to eat. It would make the perfect Christmas goodie for any person who loves edible gifts (in my opinion).

Happy Holidays!

Print Friendly and PDF

This week I'm partying at!

Semi Homemade Mom

What's cooking, love?

December 10, 2012

My Great Grandma's English Toffee

I am about to make some really bold claims about this recipe, but here it goes. THIS is the best toffee you will ever eat. It is addicting, buttery, and crunchy; heaven in a bite.

This toffee is my great grandmother's recipe which means that it really is tried and true. There is something about making it, eating it and sharing it that makes me feel connected to my great grandmother in a way that I can't even describe. I am sure she would have been proud to see this post on my blog.

My Great Grandma's English Toffee. It is the BEST toffee you will ever eat. www.the-taste-tester.com #recipe #candyThat being said, this recipe (meaning the process of making it) is not for pansies. Be prepared for blood, sweat, and tears peeps.

Your arms are going to hurt  like heck from stirring. Your legs are going to get tired of standing over such a hot hot pot for so so so long. At some point you might start cursing and screaming and wondering why you ever began this process in the first place.

From start to finish, it is going to be long time before you can eat this yummy goodness. 

Don't start if you can't finish.

Don't be tempted to turn up the heat. It won't speed things up. In fact, high heat will probably just make your toffee taste burnt and that's just gross.

I know I am making this sound daunting and scary, but if you do make this toffee I can promise you one thing: a whole lotta love.

You'll love the toffee. The toffee will love you. The people who you give it to will worship the ground you walk on. Trust me. In the end, it is all worth it. Even if you only make it once a year DO IT. You'll be glad you did.

English Toffee


1 pound (4 cubes) good quality butter*
2 cups sugar
1/2 tsp. salt
1 tsp. vanilla
2 cups walnuts or pecans, finely chopped
1 (7 oz) Hershey's milk chocolate bar, coarsely chopped

Butter a jelly roll pan. Sprinkle half of your chopped nuts across the buttered jelly roll and set the rest aside. 

In a large heavy saucepan, melt the butter over a low to medium heat. Add sugar and salt. Bring to a slow low rolling boil. Constantly stir with a wooden spoon. Watch closely. Have a jar of peanut butter or a brown paper lunch sack right next to the pot while you stir. The color will go from yellow to tan to brown. When the brown color is exactly the same color as the peanut butter or paper lunch sack, remove pot from heat. Add the vanilla and pour evenly over the nuts on the jelly roll pan. 

Immediately sprinkle the chopped chocolate over the hot toffee and let it soften and melt. Use an offset spatula or a knife to smooth the chocolate evenly over the toffee. Sprinkle the rest of your chopped nuts over the melted chocolate. When its cooled and the chocolate is set, just break into random pieces.

Recipe Source: My Great Grandma, Annie Van Leeuwen

*at some point during the hour-or-so long cooking process the butter will separate slightly from the mixture. By the time it turns peanut butter colored, the butter will return back into the mixture IF and only if you have used good quality butter. Lower quality butters contain more water and will stay separated from the sugar. This is why low quality butters are not a desirable choice for the making of this toffee.

Print Friendly and PDF

This week I'm partying here!
On The Menu Mondays @ StoneGable


Chef In Training

Semi Homemade Mom

What's cooking, love?


December 5, 2012

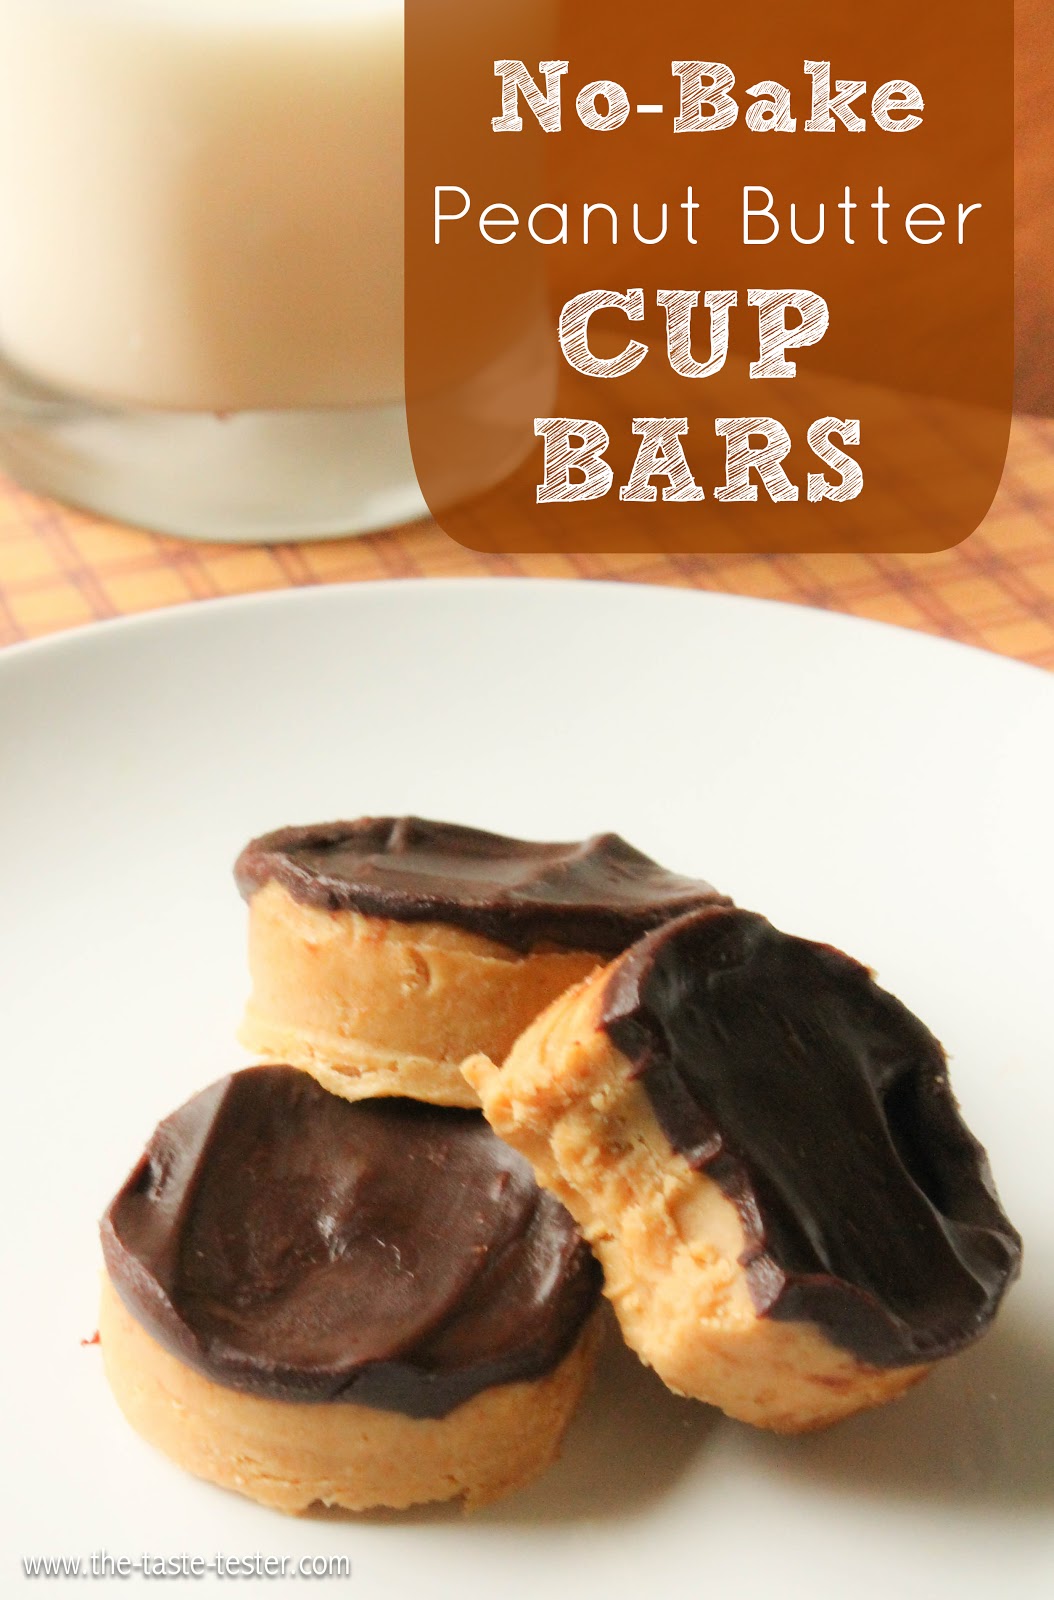
No-Bake Peanut Butter Cup Bars

When it comes to giving our neighbors gifts for the holidays, I prefer to make them anything that is super-duper-easy. The last thing I need is something that is going to take up my limited time during the holiday season. That's why I think you will find that this candy recipe is a winner!

Not only are these peanut butter cup bars delicious, but they are also homemade. Don't you just love giving and receiving homemade gifts? They taste just like a Reese's cup, and by the way Reese's Peanut Butter Cups are the best selling candy bar in the U.S. and in Canada. True story.  Random I know; it's a fact that I picked up from the Food Network yesterday.


All I am saying is, when it comes to candy-licious neighbor gifts, you can't go wrong with a homemade peanut butter cup bar. Unless of course your neighbor is allergic to peanuts and you don't know it. Then you might have a bit of a problem on your hands.

No-Bake Peanut Butter Cup Bars

1 1/2 cups graham cracker crumbs (I buy the already crushed ones because they need to be VERY fine)
3 1/4 cups powdered sugar
1 cup salted butter, melted
1 1/2 cups creamy peanut butter
1 (12 oz) package semi-sweet chocolate chips
2/3 cup heavy cream
1/2 teaspoon vanilla

Line a 9x13 pan with aluminum foil and spray with non-stick cooking spray. Mix the graham crackers and powdered sugar together in a medium size mixing bowl. Using a hand mixer, beat in the peanut butter and melted butter until completely combined. Press evenly into prepared pan.

Freeze for 20 minutes. In the meantime, place the chocolate chips in a small glass bowl. Heat the heavy cream in a small saucepan over medium high heat just until it comes to a boil. Pour the hot cream over chocolate chips. Cover the bowl with a glass plate and let sit 5 minutes.

Remove peanut butter bars from freezer. Whisk the chocolate mixture until it is smooth and shiny, adding in vanilla extract while whisking. Spread chocolate ganache mixture evenly over peanut butter bars. Refrigerate until chocolate is set.

Lift foil from pan and use a pizza cutter to easily cut the bars into small squares OR you can use a cookie cutter of your choice to cut them out. Let sit at room temperature for thirty minutes or so before eating (the peanut butter part gets nice and soft if you let them sit out for a while). 

Recipe Source: The Taste Tester, adapted from Heat Oven to 350

Print Friendly and PDF

This week I am partying here!

SixSistersStuff.com

On The Menu Mondays @ StoneGable


Chef In Training