Showing posts with label Candy. Show all posts

December 10, 2012

My Great Grandma's English Toffee

I am about to make some really bold claims about this recipe, but here it goes. THIS is the best toffee you will ever eat. It is addicting, buttery, and crunchy; heaven in a bite.

This toffee is my great grandmother's recipe which means that it really is tried and true. There is something about making it, eating it and sharing it that makes me feel connected to my great grandmother in a way that I can't even describe. I am sure she would have been proud to see this post on my blog.

My Great Grandma's English Toffee. It is the BEST toffee you will ever eat. www.the-taste-tester.com #recipe #candyThat being said, this recipe (meaning the process of making it) is not for pansies. Be prepared for blood, sweat, and tears peeps.

Your arms are going to hurt  like heck from stirring. Your legs are going to get tired of standing over such a hot hot pot for so so so long. At some point you might start cursing and screaming and wondering why you ever began this process in the first place.

From start to finish, it is going to be long time before you can eat this yummy goodness. 

Don't start if you can't finish.

Don't be tempted to turn up the heat. It won't speed things up. In fact, high heat will probably just make your toffee taste burnt and that's just gross.

I know I am making this sound daunting and scary, but if you do make this toffee I can promise you one thing: a whole lotta love.

You'll love the toffee. The toffee will love you. The people who you give it to will worship the ground you walk on. Trust me. In the end, it is all worth it. Even if you only make it once a year DO IT. You'll be glad you did.

English Toffee


1 pound (4 cubes) good quality butter*
2 cups sugar
1/2 tsp. salt
1 tsp. vanilla
2 cups walnuts or pecans, finely chopped
1 (7 oz) Hershey's milk chocolate bar, coarsely chopped

Butter a jelly roll pan. Sprinkle half of your chopped nuts across the buttered jelly roll and set the rest aside. 

In a large heavy saucepan, melt the butter over a low to medium heat. Add sugar and salt. Bring to a slow low rolling boil. Constantly stir with a wooden spoon. Watch closely. Have a jar of peanut butter or a brown paper lunch sack right next to the pot while you stir. The color will go from yellow to tan to brown. When the brown color is exactly the same color as the peanut butter or paper lunch sack, remove pot from heat. Add the vanilla and pour evenly over the nuts on the jelly roll pan. 

Immediately sprinkle the chopped chocolate over the hot toffee and let it soften and melt. Use an offset spatula or a knife to smooth the chocolate evenly over the toffee. Sprinkle the rest of your chopped nuts over the melted chocolate. When its cooled and the chocolate is set, just break into random pieces.

Recipe Source: My Great Grandma, Annie Van Leeuwen

*at some point during the hour-or-so long cooking process the butter will separate slightly from the mixture. By the time it turns peanut butter colored, the butter will return back into the mixture IF and only if you have used good quality butter. Lower quality butters contain more water and will stay separated from the sugar. This is why low quality butters are not a desirable choice for the making of this toffee.

Print Friendly and PDF

This week I'm partying here!
On The Menu Mondays @ StoneGable



Chef In Training

Semi Homemade Mom

What's cooking, love?


December 5, 2012

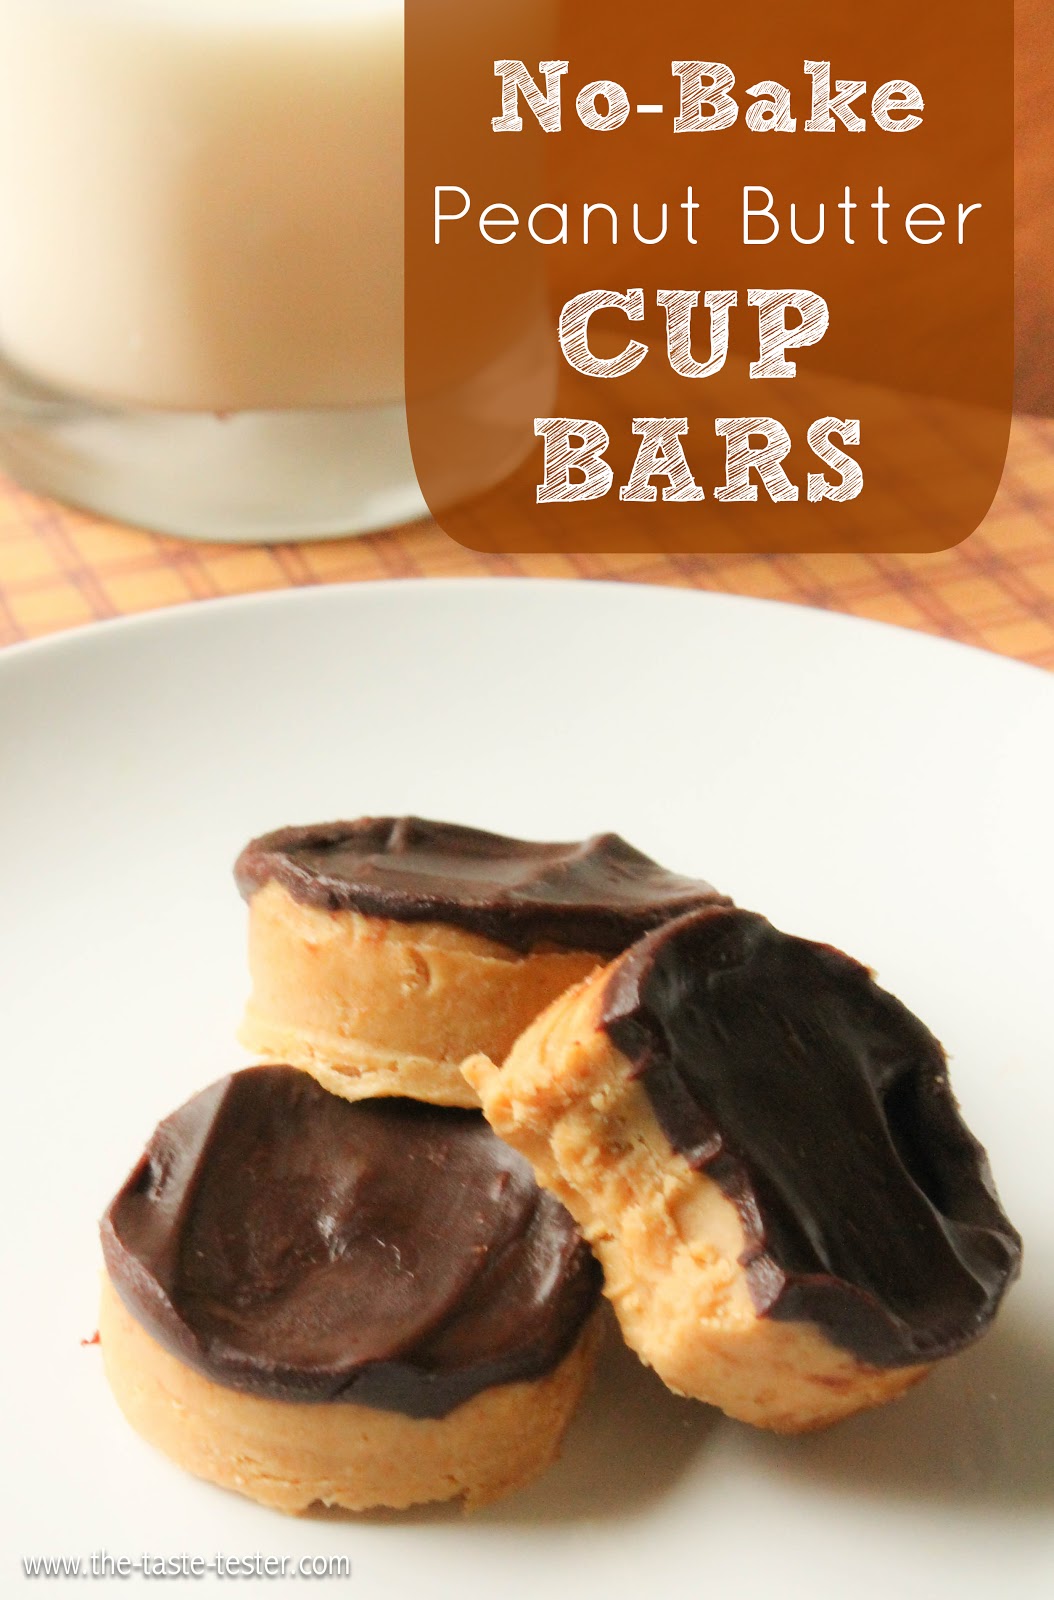
No-Bake Peanut Butter Cup Bars

When it comes to giving our neighbors gifts for the holidays, I prefer to make them anything that is super-duper-easy. The last thing I need is something that is going to take up my limited time during the holiday season. That's why I think you will find that this candy recipe is a winner!

Not only are these peanut butter cup bars delicious, but they are also homemade. Don't you just love giving and receiving homemade gifts? They taste just like a Reese's cup, and by the way Reese's Peanut Butter Cups are the best selling candy bar in the U.S. and in Canada. True story.  Random I know; it's a fact that I picked up from the Food Network yesterday.


All I am saying is, when it comes to candy-licious neighbor gifts, you can't go wrong with a homemade peanut butter cup bar. Unless of course your neighbor is allergic to peanuts and you don't know it. Then you might have a bit of a problem on your hands.

No-Bake Peanut Butter Cup Bars

1 1/2 cups graham cracker crumbs (I buy the already crushed ones because they need to be VERY fine)
3 1/4 cups powdered sugar
1 cup salted butter, melted
1 1/2 cups creamy peanut butter
1 (12 oz) package semi-sweet chocolate chips
2/3 cup heavy cream
1/2 teaspoon vanilla

Line a 9x13 pan with aluminum foil and spray with non-stick cooking spray. Mix the graham crackers and powdered sugar together in a medium size mixing bowl. Using a hand mixer, beat in the peanut butter and melted butter until completely combined. Press evenly into prepared pan.

Freeze for 20 minutes. In the meantime, place the chocolate chips in a small glass bowl. Heat the heavy cream in a small saucepan over medium high heat just until it comes to a boil. Pour the hot cream over chocolate chips. Cover the bowl with a glass plate and let sit 5 minutes.

Remove peanut butter bars from freezer. Whisk the chocolate mixture until it is smooth and shiny, adding in vanilla extract while whisking. Spread chocolate ganache mixture evenly over peanut butter bars. Refrigerate until chocolate is set.

Lift foil from pan and use a pizza cutter to easily cut the bars into small squares OR you can use a cookie cutter of your choice to cut them out. Let sit at room temperature for thirty minutes or so before eating (the peanut butter part gets nice and soft if you let them sit out for a while). 

Recipe Source: The Taste Tester, adapted from Heat Oven to 350

Print Friendly and PDF

This week I am partying here!

SixSistersStuff.com

On The Menu Mondays @ StoneGable


Chef In Training

December 3, 2012

Dark Dark Chocolate Truffles


How to Make Dark Chocolate Truffles www.the-taste-tester.com
It is officially December which means I can start sharing holiday candy recipes! I was going to start with these last week, but it just felt wrong.

When it comes to holiday candies, let's just get one thing straight. Oreo truffles are delicious and they have sort of taken the world by storm (at least they have here in Rexburg, Idaho). I have also seen them all over pinterest and the blogosphere lately.


It seems like every Christmas party I go to has a platter of oreo truffles and they disappear within minutes. Even I myself have done a version of these truffles on the blog before.


I was at a party recently where there were some oreo truffles. I was talking to the lady who made them, obviously to tell her how yummy they were, and she started telling me how easy they were to make (which I already knew). But then she said something along the lines of "They are so much easier to make than traditional chocolate truffles".


I smiled and nodded and we went our separate ways.


In response to the last statement she said I started thinking, "Really, are they that much easier? Is it easier to make an oreo truffle than a traditional chocolate truffle?".


To all visitors of the blog today, new readers and old, I am going to share a little secret with you. Making traditional chocolate truffles is just as easy as making an oreo truffle. More so actually because unless you buy your oreos already crushed very finely, I find the work of crushing a whole pack of oreos to be very obnoxious and messy (I don't have a food processor).

So here, I will show you how to make REAL truffles in as few words as possible:

First you measure out your dark chocolate into a glass bowl. Then you cover it in heavy cream that you have brought just barely to a boil. Cover this bowl with a glass plate and let the mixture sit for five minutes.

How to Make Dark Chocolate Truffles www.the-taste-tester.com

Come back and stir this chocolatey ganache-y goodness until it is smooth, creamy, and shiny. Add a little bit of extract during this step (vanilla, peppermint, almond, orange or rum--- whatever your heart desires).

How to Make Dark Chocolate Truffles www.the-taste-tester.com

Cover with plastic wrap, pressing the plastic wrap directly over the surface of the chocolate and refrigerate for at least 2 hours. When it is all set up, dip a melon baller or cookie scoop in cold water and rinse your hands in cold water as well. Scoop out the chocolate and roll it into balls between your wet hands. Yes, having cold wet hands makes a HUGE difference in the messiness factor. You may have to re-rinse your melon baller and hands in cold water every three to four truffles.

How to Make Dark Chocolate Truffles www.the-taste-tester.com

Roll them into your desired toppings (I used coconut, cocoa powder, and chopped pistachios).

How to Make Dark Chocolate Truffles www.the-taste-tester.com

Refrigerate until ready to eat and Vwah-lah! You have some real truffles. Now that was easy.
How to Make Dark Chocolate Truffles www.the-taste-tester.com

These taste like a very very dark and bitter chocolate (which I love). However if you don't like dark chocolate you could try making them with milk chocolate chips instead, though I have never tried making them that way so I can't guarantee it will work.

Wrap these up in a cute little box for all of your chocolate loving neighbors and friends. They make a perfect holiday candy gift. If these aren't the candy you were looking for this holiday season, don't worry I have many more coming your way during the month of December!

Dark Chocolate Truffles

1 1/3 cup good quality semi-sweet chocolate chips
1/2 cup heavy cream
1/2 tablespoon any flavor extract (such as vanilla)
chopped nuts, coconut, powdered sugar, cocoa powder, etc.

In a small saucepan, bring heavy cream just to a boil. Pour the cream over chocolate in a sturdy glass bowl, and shake the bowl gently to settle the cream.  Cover bowl with glass plate and let sit for 5 minutes.

Whisk chocolate mixture until it is smooth and shiny, adding the flavored extract until combined. Press some plastic wrap directly over the surface of the chocolate and refrigerate for 2 hours.

Run hands and cookie scoop (or melon baller) under very cold water. Scoop out 12 balls of chocolate and roll them between cold wet hands. Put the topping of your choice on a plate or in shallow dish and roll truffles in desired toppings. Drop onto a parchment paper lined cookie sheet. Refrigerate until ready to serve.

Recipe Source: The Taste Tester, adapted from Food Network Kitchens

Print Friendly and PDF


November 3, 2012

Make Your Own Marshmallows

I absolutely love homemade marshmallows. Their texture and consistency is exactly like that of store bought marshmallows, but they are softer and much more delicious. I will admit that if you have never made these before, it can get a little bit messy. Since I have made them many times I now know how to keep the sticky stuff {mostly} off of the surfaces in my kitchen. It just gets on my hands, and that part is my fault...
Homemade Marshmallows--- Surprisingly easy and perfect for holiday gifts or a cup of hot cocoa on a cold winter day. www.the-taste-tester.com

June 7, 2012

Strawberry Shortcake Truffles

I finally feel like life is getting back to normal. Sure, I am still REALLY sleep deprived, but I am finally starting to get back to some of the normal hobbies I had before we had our little boy. I am so glad to be food blogging again, I have really missed it.

That being said it is 9:48 pm. If I am lucky Joseph will be up again at midnight and no sooner. I need some Zzzzzzzzzzzzzzzzzzzzzzzzzzzzzzzzzzzzzzzzzzs and I only have a couple of hours (fingers crossed) to get some quality sleep.

Photo. Check.

Recipe. Check (and I would like to add that these are tasty).

Some words up at the top. Check.

Strawberry Shortcake Truffles via The Taste Tester

Strawberry Shortcake Truffles
1 package golden oreos, crushed (I like the crumbs mostly fine with a few little chunks)
1 (8 oz) package cream cheese, softened
3 medium FRESH strawberries, diced small
8 squares of white almond bark or white chocolate

Combine crushed oreos and softened cream cheese with mixer until it resembles a thick cookie dough. Fold in diced strawberries. Roll into 24 balls (I used a cookie scoop to make sure they were all the same size). Place on wax paper or parchment paper covered cookie sheet. Freeze for one hour. Melt almond bark or chocolate according to package directions. Dip truffles in almond bark or chocolate and put back on cookie sheet. Refrigerate. These are best eaten the same day they are made, which probably won't be a problem since they are so incredibly addicting. I better go run a few miles.

In 20/20 hindsight, I would much rather have used a high quality white chocolate to dip these in instead of almond bark. Don't get me wrong, they were incredible, but something high quality would have taken these up a notch. Invest.

Sweet dreams.

Recipe Source: A Taste Tester Original